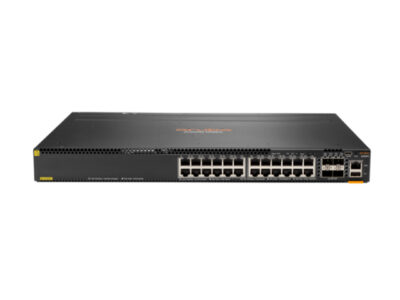
Actual product may vary from the images
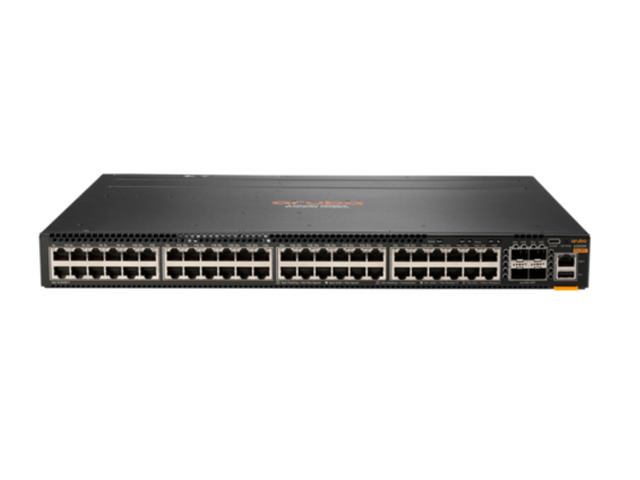
JL762A New HPE Aruba 6300M 48-port 1GbE and 4-port SFP56 Switch
MPN: JL762A | UPC: 190017 458878 | CONDITION: New
Product Details
JL762A: A Comprehensive Guide to Understanding and Implementing the HPE Aruba Switch
If you are in the market for a reliable and powerful network switch, the HPE Aruba Switch JL762A is an excellent option. This switch provides fast and efficient connectivity for both small and large businesses, and its advanced features make it a top choice for network administrators. In this article, we will explore the features and benefits of the JL762A switch, as well as provide a step-by-step guide on how to set up and configure the switch for optimal performance.
Table of Contents
- Introduction
- What is the HPE Aruba Switch JL762A?
- Key Features of the JL762A Switch
- Benefits of the JL762A Switch
- How to Set Up the JL762A Switch
- Step 1: Unpacking and Inspecting the Switch
- Step 2: Installing the JL762A Switch
- Step 3: Connecting Devices to the JL762A Switch
- Step 4: Configuring the JL762A Switch
- Best Practices for JL762A Switch Configuration
- Troubleshooting Tips for the JL762A Switch
- Conclusion
- FAQs
Introduction
The HPE Aruba 6300 Switch JL762A is a powerful network switch that is designed to provide reliable and efficient connectivity for businesses of all sizes. This switch is packed with advanced features that make it a top choice for network administrators who need high-speed and secure networking solutions.
What is the HPE Aruba Switch JL762A?
This HPE Aruba 6300 Switch is a fully managed Layer 3 switch that provides high-performance, low-latency connectivity for enterprise and SMB networks. This switch features 48 Gigabit Ethernet ports, four SFP+ 10GbE ports, and two QSFP+ 40GbE ports, making it an excellent choice for businesses with high-bandwidth requirements.
Key Features of the JL762A Switch
The HPE Aruba 6300 Switch JL762A is packed with advanced features that make it a top choice for network administrators. Some of the key features of this switch include:
- 48 Gigabit Ethernet ports
- Four SFP+ 10GbE ports
- Two QSFP+ 40GbE ports
- Fully managed Layer 3 switch
- Advanced security features, including Access Control Lists (ACLs) and 802.1X network access control
- Quality of Service (QoS) features, including traffic prioritization and classification
- VLAN support for network segmentation
- Easy-to-use web-based management interface
- Robust command-line interface (CLI) for advanced configuration
Benefits of the JL762A Switch
The HPE Aruba Switch JL762A provides several benefits for businesses, including:
- High-performance and low-latency connectivity for enterprise and SMB networks
- Advanced security features to protect against unauthorized access and attacks
- Quality of Service (QoS) features to ensure that critical network traffic is prioritized
- VLAN support for network segmentation and increased security
- Easy-to-use web-based management interface for simple configuration and monitoring
- Robust CLI for advanced configuration and troubleshooting
- Excellent warranty and support options from HPE
How to Set Up the JL762A Switch
Setting up the HPE Aruba Switch JL762A is a straightforward process. Here are the steps you need to follow:
Step 1: Unpacking and Inspecting the Switch
Before you begin, make sure you have all the necessary cables and accessories. Unpack the switch and inspect it for any damage. If you notice any damage, contact HPE immediately for assistance.
Step 2: Installing the JL762A Switch
Once you have inspected the switch, it’s time to install it. The JL762A switch is rack-mountable, so you will need to install it in a standard 19-inch rack. Make sure you have all the necessary mounting hardware and follow the instructions provided by HPE for installation.
Step 3: Connecting Devices to the JL762A Switch
Once the switch is installed, it’s time to connect your devices. Connect your network devices to the switch using Ethernet cables. If you have devices that require 10GbE or 40GbE connectivity, connect them to the appropriate ports on the switch.
Step 4: Configuring the JL762A Switch
After connecting your devices, it’s time to configure the switch. The JL762A switch has an easy-to-use web-based management interface that allows you to configure the switch using a web browser. You can also use the CLI for advanced configuration and troubleshooting.
During the configuration process, you can set up VLANs, configure QoS settings, and set up security features such as ACLs and 802.1X network access control. Make sure you follow best practices for switch configuration to ensure optimal performance and security.
Web-based GUI Configuration:
- Connect to the switch through a web browser by entering its IP address in the address bar.
- Log in to the switch using the default username and password (admin/admin).
- Navigate to the configuration menu and select the settings you want to modify, such as VLAN settings or port configurations.
- Save your changes and apply the new configuration.
CLI Configuration:
- Connect to the switch using a terminal emulator, such as PuTTY, using a serial or Ethernet connection.
- Log in to the switch using the default username and password (admin/admin).
- Enter the configuration mode by typing “configure terminal” command.
- Modify the settings you want to change, such as VLAN settings or port configurations, using the appropriate commands.
- Save your changes by typing “write memory” command.
It is important to note that the switch has a comprehensive user manual available that provides detailed instructions on how to configure the switch. It is recommended to refer to this manual for more specific configuration details.
Best Practices for JL762A Switch Configuration
To ensure optimal performance and security, it’s important to follow best practices when configuring the JL762A switch. Here are some tips to keep in mind:
- Use VLANs to segment your network and increase security.
- Configure QoS settings to prioritize critical network traffic.
- Use ACLs and 802.1X network access control to control access to your network.
- Enable Spanning Tree Protocol (STP) to prevent network loops.
- Use the CLI for advanced configuration and troubleshooting.
Troubleshooting Tips
Despite its advanced features and reliable performance, the JL762A switch may encounter issues from time to time. Here are some troubleshooting tips to help you resolve common issues:
- Check your cables and connections to ensure they are properly connected.
- Verify that your network devices are configured correctly.
- Check the switch logs for any error messages or alerts.
- Use the CLI to perform advanced troubleshooting.
Conclusion
This HPE Aruba 6300 Switch is an excellent choice for businesses that require reliable and high-performance networking solutions. Its advanced features, easy-to-use management interface, and robust CLI make it a top choice for network administrators. By following best practices for configuration and troubleshooting, you can ensure optimal performance and security for your network.
FAQs
Q: What is the warranty for the HPE Aruba Switch JL762A?
A: The switch comes with a limited lifetime warranty from HPE.
Q: How many Gigabit Ethernet ports does the JL762A switch have?
A: The JL762A switch has 48 Gigabit Ethernet ports.
Q: Can I use the JL762A switch for a small business network?
A: Yes, it is suitable for both small and large business networks.
Q: Does the JL762A switch support 10GbE and 40GbE connectivity?
A: Yes, this switch has four SFP+ 10GbE ports and two QSFP+ 40GbE ports.
Q: Is the JL762A switch easy to configure?
A: Yes, this switch has an easy-to-use web-based management interface that simplifies the configuration process.
Technical specifications
| Product Number | JL762A |
| Ports | 48 x 10/100/1000 BASE-T ports and (4) 1/10/25/50G SFP ports |
| Memory and processor | Quad Core ARM Cortex™ A72 @ 1.8GHz, 8 GBytes DDR4 32 GBytes eMMC 8 MB Shared Packet Buffer Memory |
| Latency | 1Gbps: 2.28 Sec, 10Gbps: 1.46 Sec, 25Gbps: 1.90 Sec, 50Gbps: 3.49 Sec |
| Throughput | 369 Mpps |
| Switching capacity | 496 Gbps |
| PoE capability | Up to 2,880 Watts depending on model and installed power supplies |
| Stacking capabilities | Up to 10 switches per stack ** |
| Management features | Aruba AirWave Aruba Central Network Management Aruba NetEdit Command-line interface SNMP v2c/v3 RMON |
| Input voltage | 100-240 VAC |
Sources:
| Weight | 15 lbs |
|---|---|
| Dimensions | 18 × 16 × 2 in |
| SKU | JL762A |
| Condition | New |
| Brand | HPE |
| GTIN | 190017 458878 |
- The warranty for refurbished units is 30 days.
- The warranty for New units is as per the manufacturer’s terms and conditions.


