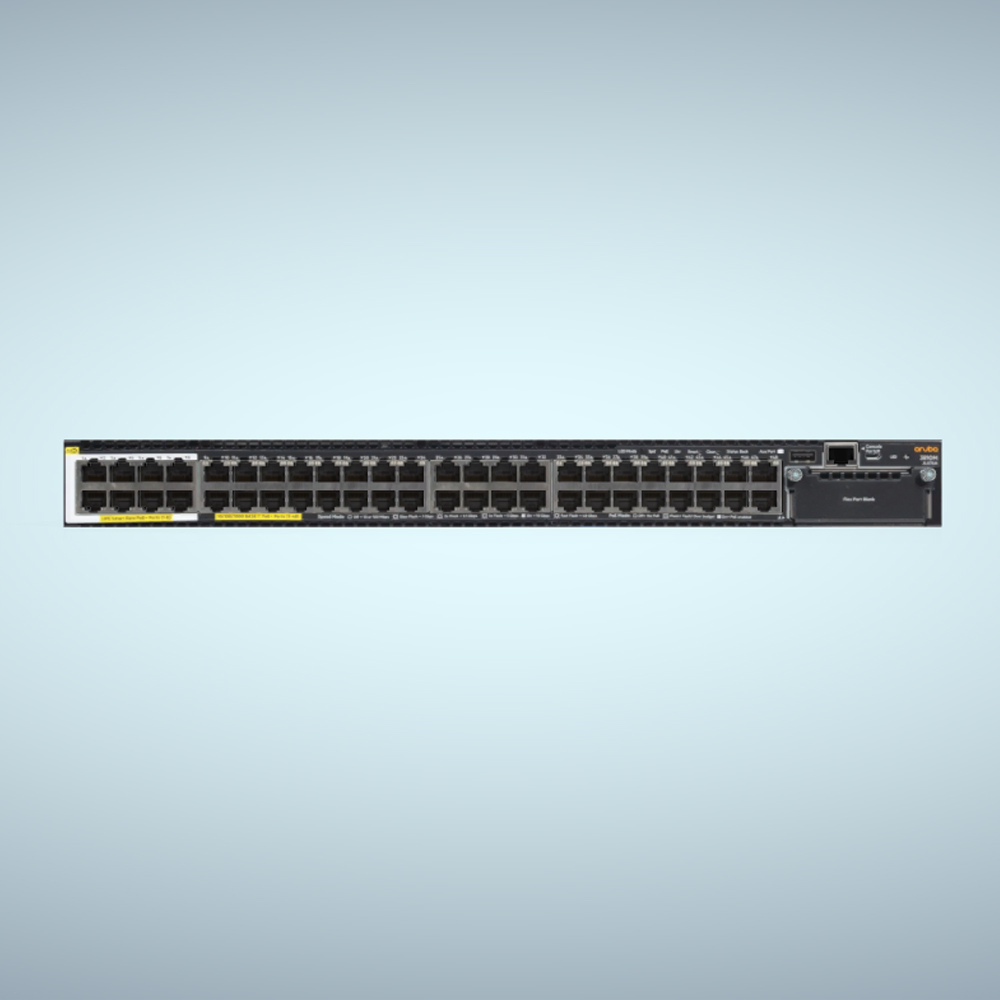
The Aruba 3800 Switch is a powerful networking solution that can help organizations unlock the full potential of their network infrastructure. With its advanced features and capabilities, the 3800 Switch is designed to provide organizations with the flexibility and scalability they need to support their growing network needs.
One of the key benefits of the Aruba 3800 Switch is its ability to support high-speed data transfer and routing. With support for up to 10 Gbps of throughput and advanced routing protocols, the 3800 Switch can handle even the most demanding network traffic with ease.
Another benefit of the 3800 Switch is its ability to provide robust security for your network. With support for advanced security features such as access control lists (ACLs) and virtual private networks (VPNs), the 3800 Switch can help protect your network from unauthorized access and cyber threats.
In addition to its performance and security capabilities, the 3800 Switch also offers a variety of management and monitoring tools to help organizations manage and optimize their network. With support for advanced monitoring and troubleshooting capabilities, the 3800 Switch can help organizations identify and resolve network issues quickly and efficiently.
Overall, the Aruba 3800 Switch is a powerful and versatile networking solution that can help organizations unlock the full potential of their network infrastructure. With its advanced features and capabilities, the 3800 Switch is the perfect choice for organizations looking to support their growing network needs.
Setting Up Your Aruba 3800 Switch
The Aruba 3800 Switch is a powerful and versatile networking device that can be used to build and manage large-scale enterprise networks. In this step-by-step guide, we will walk you through the process of setting up your Aruba 3800 Switch, from initial configuration to advanced features and troubleshooting.
Prerequisites
Before you begin, make sure that you have the following:
- A console cable
- A USB-to-serial adapter (if your computer does not have a serial port)
- The latest firmware for your Aruba 3800 Switch
Initial Configuration
- Connect the console cable to the console port on the Aruba 3800 Switch and the other end to your computer’s serial port (or USB-to-serial adapter).
- Power on the Aruba 3800 Switch.
- Open a terminal emulator (such as PuTTY) and configure it to use the correct serial port and baud rate (115200, 8, N, 1).
- Press Enter to start the initial configuration wizard.
- Follow the prompts to configure the basic settings of the Aruba 3800 Switch, such as the hostname, IP address, and admin password.
Configuring VLANs - Best Practices for Aruba 3800 Switches
- Keep VLANs small: Large VLANs can lead to broadcast storms and other performance issues. It’s best to keep VLANs as small as possible, containing only the devices that need to communicate with each other.
- Use VLAN tagging: VLAN tagging, also known as 802.1Q tagging, allows you to assign multiple VLANs to a single physical port. This can help you conserve switch ports and reduce the amount of cabling required.
- Use VLAN trunking: VLAN trunking allows you to carry multiple VLANs over a single physical link. This can help you reduce the amount of cabling required and improve network scalability.
- Use VLANs to segment your network: Use VLANs to segment your network into different areas, such as a guest network, a production network, or a management network.
- Use VLANs for security: Use VLANs to segment your network into different security zones, such as a DMZ or a LAN.
- Log in to the Aruba 3800 Switch’s web interface using the IP address configured in the initial configuration.
- Navigate to the VLANs section.
- Create a new VLAN by entering a VLAN ID and a name.
- Assign ports to the VLAN by selecting them from the list and clicking on the “Add” button.
- Repeat steps 3-4 for additional VLANs as needed.
Configuring Link Aggregation - Best Practices for Aruba 3800 Switches
Link aggregation allows you to combine multiple network interfaces into a single, logical interface. This can help you increase network bandwidth and improve network redundancy. Link aggregation can be configured using either static link aggregation or LACP (Link Aggregation Control Protocol).
When configuring link aggregation on the Aruba 3800 Switch, there are several best practices to keep in mind:
- Use LACP: LACP allows you to dynamically configure link aggregation, which can help you ensure that the best links are being used at all times.
- Use the same speed and duplex settings: To ensure that link aggregation works properly, all interfaces in the link aggregation group should have the same speed and duplex settings.
- Use the same VLAN settings: All interfaces in the link aggregation group should be configured with the same VLAN settings.
- Use a switch that supports link aggregation: Some switches do not support link aggregation, so make sure that the switch you are using does support it.
The Aruba 3800 Switch supports link aggregation, and it can be configured using either static link aggregation or LACP. To configure link aggregation on the switch:
- Navigate to the Link Aggregation section in the web interface.
- Create a new Link Aggregation Group (LAG) by entering a name and selecting the ports to be aggregated.
- Configure the LAG settings, such as the LACP mode and the LAG load balancing method.
Stacking Aruba 3800 Switches - Best Practices
Stacking multiple switches together can provide several benefits in terms of high availability and scalability. The Aruba 3800 Switch supports stacking, and in this guide, we will explore the best practices for stacking Aruba 3800 Switches.
When stacking Aruba 3800 Switches, there are several best practices to keep in mind:
- Use the same model of switch: To ensure that stacking works properly, all switches in the stack should be the same model. For Instance, if you want to stack JL429A, stack it with JL429A. Similarly, if you need to stack JL076A, then stack it with JL076A. And don’t mix up switches such as don’t stack a JL073A to JL430A
- Connect switches using stacking cables: To ensure that the stack is properly connected, use stacking cables to connect the switches.
- Use the same firmware version: To ensure that the stack is stable and all switches are working together properly, all switches in the stack should be running the same firmware version.
- Use a stack master: One switch in the stack should be designated as the stack master, which will be responsible for controlling the stack and managing the other switches.
To configure stack on Aruba 3800 Switches:
- Connect the switches using stacking cables.
- Log in to the web interface of one of the switches and navigate to the Stacking section.
- Create a new stack by entering a name and selecting the switches that you want to include in the stack.
- Configure the stack settings, such as the stack master and the stacking mode.
- Apply the changes.
Mesh Stacking - each switch connected to one or more other switches
Mesh stacking is a way of connecting multiple switches together to form a single, logical switch, where each switch can connect to one or more other switches in the stack. This allows for increased scalability and high availability, as well as ease of management and configuration. It also allows for more flexibility in terms of physical connections and topology.

Ring Stacking - each switch is connected to two other switches
Ring stacking is a way of connecting multiple switches together to form a single, logical switch, where each switch is connected to two other switches in the stack. This creates a ring topology, where data is passed in a circular pattern between the switches. This allows for increased scalability and high availability, as well as ease of management and configuration. It also allows for faster data transfer between switches and redundancy in case of a switch failure.

Chain Stacking - each switch is connected to one other switch
Chain stacking is a way of connecting multiple switches together to form a single, logical switch, where each switch is connected to one other switch in the stack. This creates a chain topology, where data is passed sequentially between the switches. This allows for increased scalability and high availability, as well as ease of management and configuration. It also allows for redundancy in case of a switch failure.

Advanced Features
The Aruba 3800 Switch offers a wide range of advanced features, such as Quality of Service (QoS), Access Control Lists (ACLs), and sFlow. These features can be configured through the web interface or using the CLI. With this step-by-step guide, you should now be able to set up and manage your Aruba 3800 Switch with ease. The guide covers all the basic and advanced features of the switch, including the initial configuration, configuring VLANs, link aggregation, advanced features.
Switches in Aruba 3800 Series
The Aruba 3800 series offers various switch options to choose from depending on your needs. Here are a few of them in case you would like to get the part numbers and read more details about them.


